Introduction
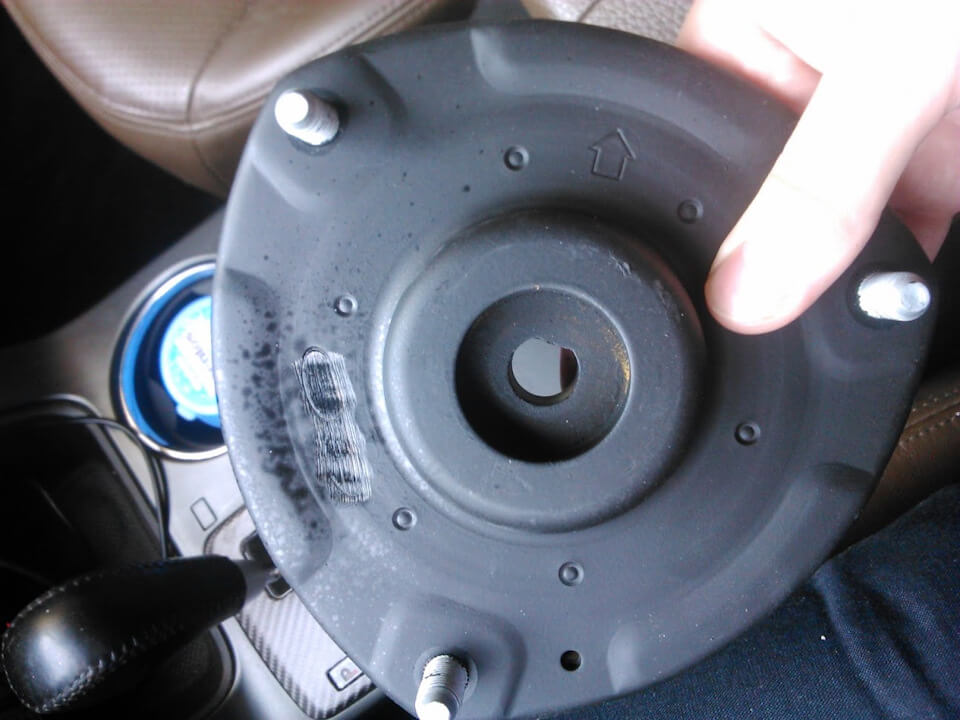
Strut mounts are critical components connecting the vehicle’s suspension strut to the chassis. Beyond simple mounting, they isolate road vibrations, maintain alignment, and ensure comfort. Engineering-grade strut mounts use advanced rubber compounds, metal bonding techniques, and manufacturing tolerances to meet OEM and performance specifications.
This 2025 guide explains the material science, engineering classifications, and testing principles behind strut mounts, designed by the JCMS Tech Engineering Team — experts in chassis and NVH (Noise, Vibration, Harshness) systems.
What Is a Strut Mount and Why It Matters
A strut mount serves as both a structural link and a vibration damper. It connects the MacPherson strut assembly to the vehicle body, bearing vertical loads (spring compression) and lateral forces from cornering or braking. The top of the mount contains rubber or elastomer elements that cushion impact and reduce road noise.
High-quality mounts ensure proper suspension geometry, smooth steering return, and consistent ride comfort. Low-quality or worn mounts can cause alignment drift, steering vibration, or clunking noises during acceleration or braking.
Engineering Grades & Material Comparison
Strut mount grades are typically categorized by their material hardness, durability, and damping capability. Below is a comparison of the most common materials used in modern designs:
| Material Type | Hardness (Shore A) | Durability | NVH Damping | Cost Level |
|---|---|---|---|---|
| Natural Rubber (NR) | 60–65 | Medium | Excellent | Low |
| EPDM Rubber | 70–75 | High | Good | Medium |
| Polyurethane | 80–90 | Very High | Fair | Medium–High |
| Thermoplastic Elastomer (TPE) | 75–85 | Very High | Moderate | High |
Design Principles & Load Paths
Engineering-grade strut mounts are designed to handle complex load paths: vertical (spring compression), radial (cornering force), and torsional (steering rotation). Mount geometry is optimized through finite element analysis (FEA) to minimize stress concentration and ensure even force distribution.
- Rubber-metal bonding strength ≥ 7 MPa (shear test per ASTM D429)
- Rubber durometer tolerance ±3 Shore A
- Metal plate yield strength > 280 MPa (for stamped steel mounts)
- Deflection angle under 500 N load: ≤ 1.5°
Testing Standards & Quality Verification
To qualify as “engineering grade,” strut mounts undergo several durability and material verification tests. Common industry standards include:
- SAE J1202: Rubber-bonded-to-metal durability test (thermal and mechanical fatigue).
- ASTM D2000: Rubber classification system for automotive applications.
- ISO 7619-1: Shore A hardness measurement for elastomers.
- OEM Bench Tests: Vertical static compression, torsional fatigue, and salt-spray corrosion tests.
Symptoms of a Bad Strut Mount
Strut mounts don’t just fail instantly — they deteriorate over time. Recognizing the symptoms early can prevent costlier repairs.Symptom 1: Clunking Sound During Turns or Bumps
This is usually the first sign. The clunk originates from the top of the suspension tower and is most audible at low speeds or when going over speed bumps.- Cause: Cracked rubber, loose mounting bolts, or degraded strut bearing.
- How to Confirm: Use a stethoscope or mechanic’s hose during steering operation while parked.
Symptom 2: Steering Feels Sticky or Notchy
This often indicates that the internal bearing has seized or is improperly seated.Symptom 3: Uneven Tire Wear
Since the strut mount plays a role in alignment angles (especially camber), a failing mount can create abnormal tire wear even after alignment.Toyota Camry Case Study (XV50, 2012–2017)
- Symptoms: Low-speed clunking during tight turns, misalignment readings, creaking noise on cold starts
- Diagnosis: Strut itself was new, but mount had internal rubber fractures and the bearing was dry and pitted
- Solution: Replaced strut mount and bearing only; KYB SM5645 mount and Koyo OEM bearing were used
- Cost: ~$90 in parts, ~$180 in labor at an independent shop
Kia Forte Case Study (2014–2018)
- Symptoms: Highway instability, drifting to the right, knocking noise on rebound
- Diagnosis: Mount had collapsed, causing spring misalignment and camber shift
- Solution: Full replacement with Monroe Quick-Strut assembly; resolved all ride issues
- Cost: ~$190 per assembly, ~$120 in labor

Practical Recommendation Table
| Condition | Recommended Fix |
|---|---|
| Mount cracked, strut OK | Replace mount + bearing |
| Steering clunks, vehicle >5 yrs | Replace both mount and bearing |
| Strut and mount old, >75k miles | Replace entire strut assembly |
| Rear axle mount noise | Replace mount only (no bearing present) |
Should You Replace the Mount, the Whole Assembly, or Just the Bearing?
Clunking noises persisted after new struts were installed. Mounts looked fine visually but internally had collapsed bearings. Problem solved only after mount + bearing replacement.
Choosing the right replacement strategy depends on your vehicle’s mileage, the condition of the strut, and whether symptoms are related to steering, clunking, or poor handling. Below is a comparison of three common options:
| Option | When to Use | Pros | Cons |
|---|---|---|---|
| Mount only | Strut is relatively new; noise or rubber cracks present | Cheapest option | Requires spring compressor; labor-intensive |
| Mount + Bearing | Steering stiffness, popping noise during turns | Fixes both rotation and isolation issues | Requires alignment and bearing positioning knowledge |
| Full Assembly | Strut, mount, and spring all aged (70k+ miles) | Quickest install, preloaded assembly | Higher parts cost |
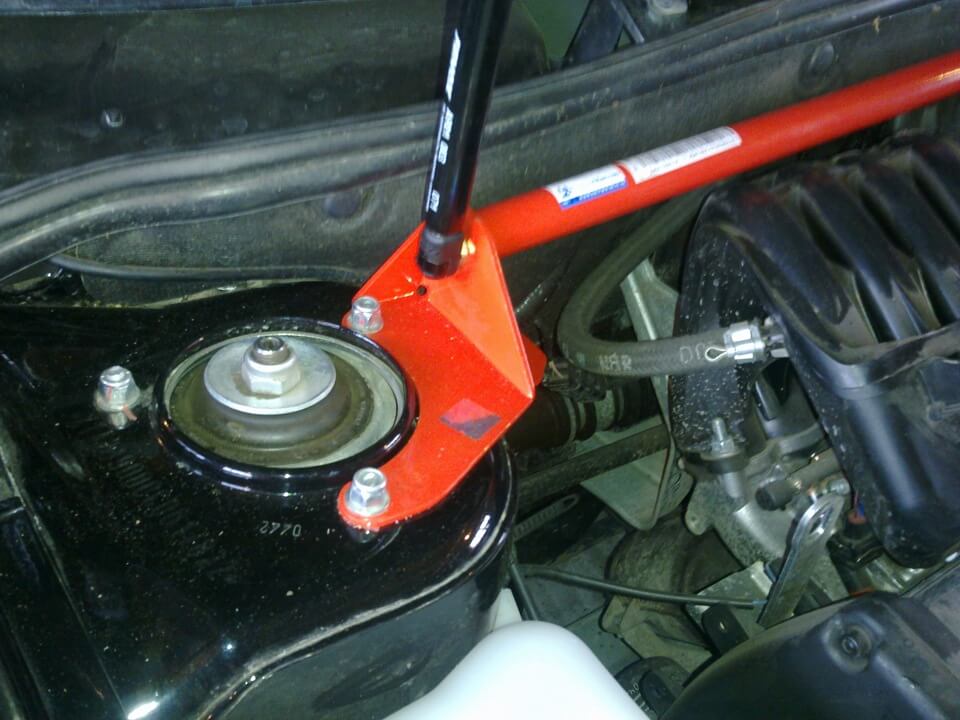
How to Replace a Strut Mount (Step-by-Step with Safety Notes)
⚠️ Warning: Coil springs are under high tension. Use a professional-grade spring compressor. Never attempt this job without proper safety tools and jack stands.
- Raise the vehicle securely: Use a hydraulic jack to lift the car and place it on jack stands. Remove the wheel to expose the strut assembly.
- Disconnect components: Unbolt the brake line brackets, sway bar end link, and ABS wire from the strut. Mark the camber bolt position if reusing the strut.
- Remove the strut: Unbolt the two strut-to-knuckle bolts. Loosen and support the upper strut mount bolts under the hood.
- Use a spring compressor: Carefully compress the coil spring. Verify the spring is fully captured before loosening the strut nut.
- Disassemble the strut top: Remove the top nut using an impact wrench or strut socket. Take off the old mount and bearing.
- Install new components: Replace with the new mount and bearing. Align the top plate as per vehicle specs. Double-check bearing orientation for steering models.
- Decompress slowly: Release the spring compressor gradually after verifying correct seating of all parts.
- Reinstall strut: Torque all bolts to OEM specs. Reconnect brake and ABS components. Replace any damaged fasteners.
- Repeat on opposite side: Strut mounts should be replaced in pairs for balance.
- Alignment required: After installation, take the vehicle for a professional wheel alignment.
🛠️ Tip: Take reference photos before disassembly, and label bolts/nuts if needed. For DIYers, consider using complete strut assemblies to reduce spring compressor risks.
Strut Mount Torque Specs – Top 10 Models
| Make | Model | Year | Strut Top Nut | Upper Mount Bolt | Knuckle Bolt | Source |
|---|---|---|---|---|---|---|
| Toyota | Camry | 2018 | 36 ft-lbs | 29 ft-lbs | 156 ft-lbs | RepairPal |
| Kia | Forte | 2020 | 37 ft-lbs | 33 ft-lbs | 151 ft-lbs | Monroe |
| Honda | Civic | 2016 | 40 ft-lbs | 25 ft-lbs | 122 ft-lbs | AllDataDIY |
| Ford | Focus | 2014 | 41 ft-lbs | 30 ft-lbs | 128 ft-lbs | NHTSA |
| Subaru | Outback | 2019 | 36.9 ft-lbs | 33 ft-lbs | 150.5 ft-lbs | Raybestos |
| Hyundai | Elantra | 2017 | 38 ft-lbs | 31 ft-lbs | 148 ft-lbs | YourMechanic |
| Chevrolet | Malibu | 2015 | 42 ft-lbs | 28 ft-lbs | 135 ft-lbs | AutoZone |
| Nissan | Altima | 2013 | 39 ft-lbs | 30 ft-lbs | 140 ft-lbs | RepairPal |
| Jeep | Cherokee | 2020 | 43 ft-lbs | 35 ft-lbs | 153 ft-lbs | YourMechanic |
| Mazda | 3 | 2019 | 34 ft-lbs | 26 ft-lbs | 129 ft-lbs | KYB |
FAQ & Common Mistakes
Can I drive with a bad strut mount?
Technically yes, but it compromises safety, tire life, and ride comfort. Continuing to drive may also cause strain on nearby components.
Do I need alignment after replacing the mount?
Absolutely. Strut mount position affects camber and caster angles. Always re-align after mount or strut replacement.
Can I replace just one strut mount?
It’s possible, but not recommended. Experts suggest replacing mounts in pairs (left and right) to ensure balanced handling[6].
Common Mistake: Ignoring visible corrosion on mount bracket or bearing plate
Rust can cause the spring to bind or bearing to seize, leading to delayed release and noise during turns. If you see rust flaking off the strut tower, consider full cleanup or replacement[6].
References
- KYB Technical Manual – Mount Construction and Material Spec, 2023
- ZF Aftermarket Suspension Guide, 2023 Edition
- CarParts.com Blog, “What is a Strut Mount?”, updated May 2024
- Monroe Quick-Strut Product Manual, 2024
- RepairPal Strut Mount & Bearing Diagnosis
- User-contributed teardown script and diagnosis notes, uploaded Oct 2025.